Some of us still haven't outgrown the use of Microsoft RRaS as a VPN server. Why should we? It is simple to setup, easy to configure and just plain works!
The other day I decided to setup a RRaS server in Azure to replace an old one we had on premise. It turns out that RRaS isn't officially supported in Azure, but that isn't going to stop us is it?
The reason it apparently isn't supported is because of how routing is configured in Azure. At least, that's the Cliffs Notes version I gathered. I read an article from Richard Hicks that says that you can make it work by enabling IP forwarding on your RRaS VM, then adding a routing table to your vnet to make it work. He's half right, you should enable IP forwarding on your VM's NIC like this:
You'll also want to allow ports 443, 1701, 500 and 4500 to your VPN server in your Network Security Group:
That being said, the rest is easy!
- Install the Remote Access role, and select Direct Access and VPN (RAS) and Routing.
- After the install, run the getting started wizard and select the Deploy VPN only option (Unless you need direct access, but that is outside the scope of this post)
- When you open the RRaS console, right click your server name and select Configure and Enable Routing and Remote Access.
- Click Next, then select Custom Configuration (Since we're setting this up with a single NIC host)
- Next select all options, then click Next again and follow the rest of the prompts to install RRaS.
Now you're ready to configure everything. The only two things you need to know about setting up RRaS in Azure:
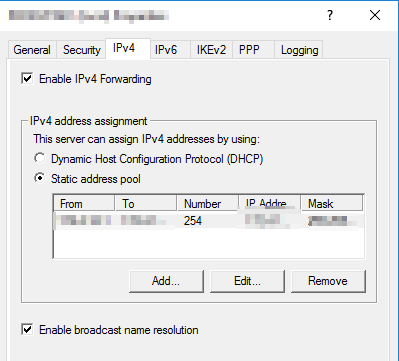
- You can't point RRaS to an internal DHCP server in Azure, and you can't point RRaS to Azure's DHCP services, so you have to assign IP's from a static address pool in the IPv4 tab under your RRaS server properties. This IP range can't be one that exists in Azure, or matches the host that you're using as your RRaS server.
.
- Since we're not using a custom routes, we need to configure NAT by adding both the Ethernet interface and the internal interface under NAT in the RRaS console.
The Ethernet properties should look like this under NAT:
The Internal interface properties should look like this:


 6:00 AM
 Paul B


